Most people picture solar installation as a team arriving, fixing panels to the roof, and leaving by teatime. Parts of that are true, but the real process is a bit more structured than that. If you are wondering what happens during solar installation, the short answer is this: your installer checks the property, prepares the site, fits the equipment safely, connects the system, tests everything properly, and then hands it over with the paperwork you need.
That process is usually straightforward when the installer has planned well. For homeowners and businesses alike, the main thing to know is that a good installation should feel organised, not rushed. You should know what is being fitted, where each component will go, how long the work is likely to take, and what happens if your roof, electrics or meter setup needs extra attention.
What happens before solar installation starts
Before any tools come out, there is normally a survey and system design stage. This is where the installer confirms whether your roof is suitable, how many panels make sense, and whether extras like battery storage or an EV charger should be included.
At this point, they will usually look at roof size, pitch, shading, orientation and the condition of the tiles or covering. They will also check your consumer unit and the general state of the electrical setup. If you are installing solar on a commercial building, they may also review access, loading considerations and working hours so the job causes as little disruption as possible.
This early stage matters because not every property is identical. A south-facing roof with little shade is different from a roof split across several elevations. A newer home with modern electrics is different from an older property that may need electrical upgrades first. This is often where realistic expectations are set.
Once the design is agreed, the installer orders materials and schedules the work. Depending on the setup, that may include panels, mounting rails, inverters, isolators, cabling and a battery. If scaffolding is needed, that is usually arranged ahead of the installation date.
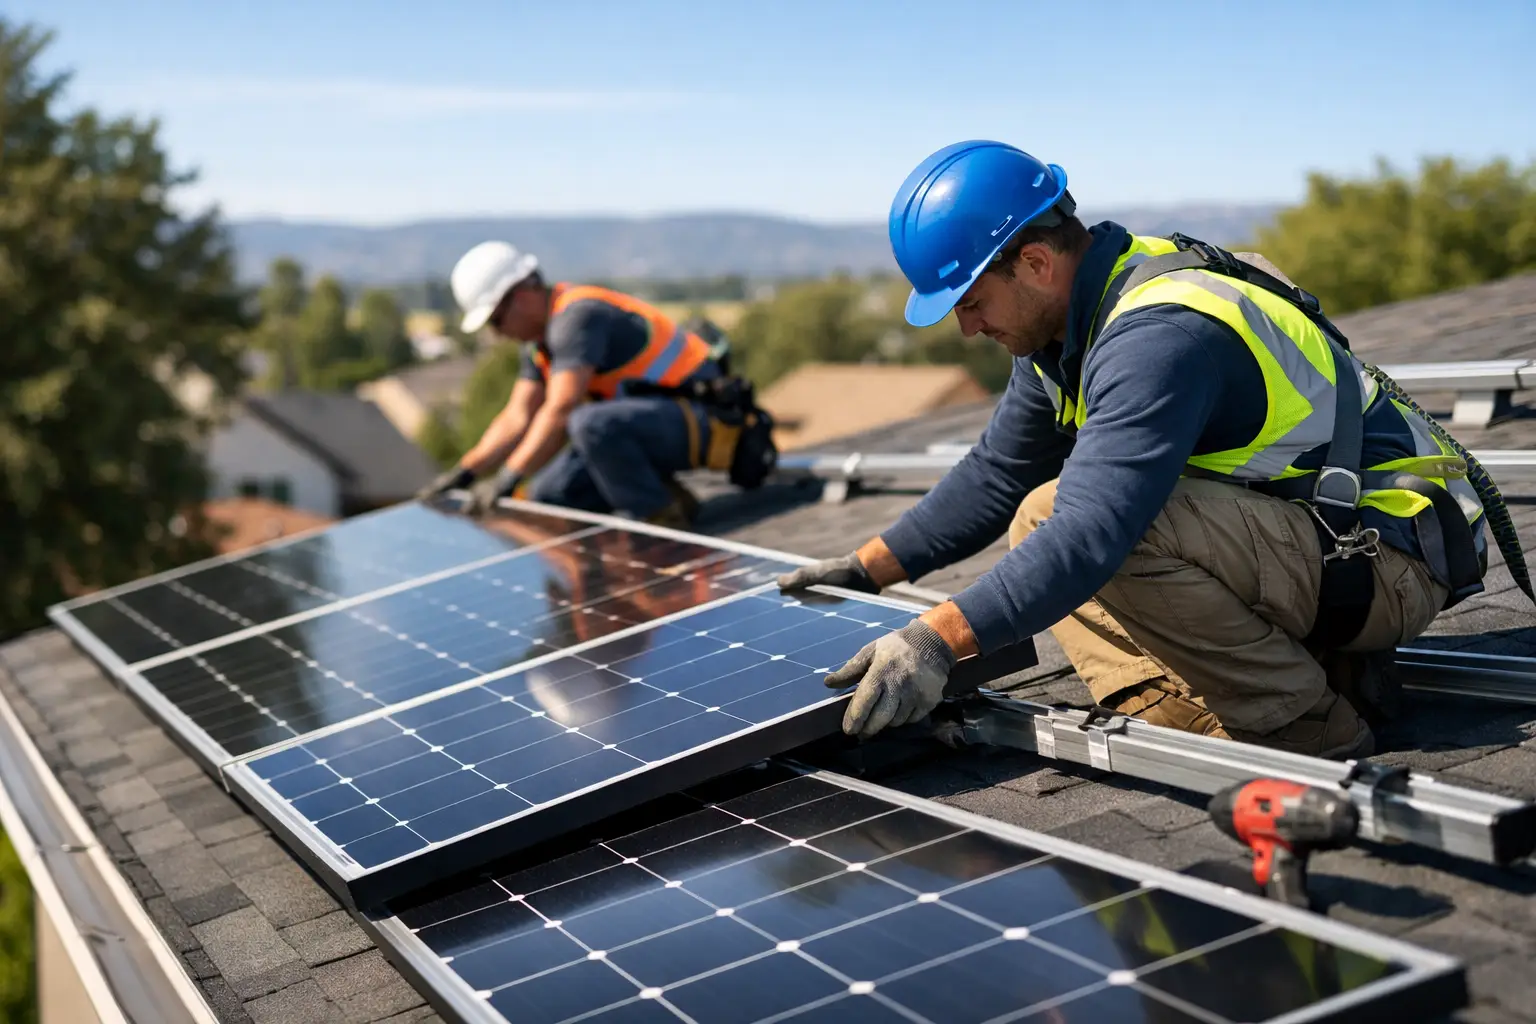
The first day on site
In many cases, the first visible step is scaffolding. That can go up a day or two before the install team starts, although smaller or easier-access jobs may vary. Scaffolding is there for safety and proper access, not to make the job look bigger than it is.
When the installers arrive, they will normally begin by confirming the layout and protecting working areas where needed. You may see materials unloaded, cable routes checked again, and final positions marked out for the inverter and any battery system. This is a good time to ask questions if anything differs from what you expected.
For most domestic systems, the installation itself is often completed within one to two days. Larger homes, complex roofs or systems with batteries can take longer. Commercial projects may run over several days depending on scale and access requirements.
What happens on the roof during solar installation
The roof work starts with the mounting system. Installers fit roof hooks or brackets beneath the tiles or other roof covering, then attach rails that hold the panels in place. The aim is to create a secure fixing system that can handle wind, weather and long-term use without compromising the roof.
This part of the job needs care. Good installers are not simply drilling panels onto the roof surface. They are working with a mounting system designed for the specific roof type, whether that is slate, tile, metal sheeting or another material. Roof coverings are lifted and replaced as part of the fitting process so the final result is weatherproof and tidy.
Once the rails are in place, the solar panels are fixed onto them and connected together in strings. Cabling is routed neatly and safely, rather than left exposed or loosely clipped. From ground level, a well-installed system should look clean and intentional.
There can be some noise while this is happening, mostly from movement on the roof and general site activity. It is rarely a major disruption, but if you work from home it is worth planning for a busier day than usual.
What happens inside the property
While one part of the team may be working on the roof, another may be handling the electrical side indoors. This usually involves fitting the inverter, which converts the electricity generated by the panels into usable power for your property.
The inverter is commonly installed in a loft, garage, utility area or another suitable location. If a battery is included, that will also be fitted in an agreed position with enough ventilation and safe access. The installer then runs cabling between the panels, inverter, battery and consumer unit.
This is often the part people are least sure about, because it sounds more disruptive than it usually is. In practice, a good installer will try to keep cable runs discreet and will explain where equipment needs to go. Some homes allow for very neat hidden routes. Others need visible trunking in certain areas. Neither is necessarily a problem, but it is something that should be discussed openly.
If your existing electrics need improvement, the installer should tell you before work starts or as soon as it becomes clear. Sometimes an older consumer unit or a lack of suitable isolation points means additional electrical work is needed. That can add cost, but it is better than forcing a new solar system onto infrastructure that is not up to standard.
Testing, commissioning and safety checks
After the physical installation is complete, the system is tested. This is a key part of what happens during solar installation, and it should never be treated as a quick afterthought.
The installer checks that the wiring is correct, that the system is performing as expected, and that all safety devices operate properly. They will also commission the inverter and battery, if one has been installed, and make sure monitoring is set up if your system includes an app or online portal.
You may also be shown how the isolators work and what normal operation looks like on the inverter screen or monitoring platform. The goal is not to turn you into an engineer. It is simply to make sure you know how to read the basics, spot an alert, and understand what your system is doing.
In a properly managed job, this stage also includes the documentation. That can cover warranties, product manuals, certification and information related to export payments or grid notification, depending on the system and your energy arrangement.
Will your power be off during the install?
Usually, there is a short power interruption when the installer connects the system to your electrical supply. For most properties, this is brief rather than an all-day outage. Your installer should let you know in advance when that is likely to happen.
If you work from home, rely on medical equipment, or run a business with sensitive equipment, raise that early. Installers can often plan around it, but only if they know. This is one of those small details that makes the whole experience easier.
How long before the system is up and running?
In many cases, the system can be switched on once installation, testing and any required sign-off are complete. However, there are situations where timing depends on paperwork, meter arrangements or network approval. This is especially relevant for larger systems or properties adding battery storage and export functionality.
That is why expectations matter. Some customers assume power generation starts the moment the last panel is fixed. Sometimes it does. Sometimes there is a short wait for final steps. A trustworthy installer will explain that clearly rather than overpromise.
What a good handover looks like
At the end of the installation, you should not be left guessing. A proper handover means the installer explains how the system works, what you need to do if there is a fault, and what maintenance is recommended.
Solar panels themselves are generally low maintenance, but that does not mean no maintenance at all. You may need occasional inspections, cleaning in certain conditions, or checks after severe weather. Batteries and inverters also have their own expected lifespan and warranty terms, so it is worth understanding those from day one.
If you are comparing quotes, this is one area where quality really shows. The cheapest quote is not always the best if the aftercare is weak, the paperwork is unclear, or the installer is hard to reach once the job is finished. That is one reason many customers prefer to compare vetted, MCS-accredited installers rather than trying to judge the market alone.
What happens during solar installation if something is not straightforward?
Sometimes the install day reveals an issue that was not obvious at survey stage. A roof may need minor remedial work. Cable routing may be more awkward than expected. The meter position might limit where equipment can go. None of this automatically means the project is in trouble.
What matters is how it is handled. A professional installer will explain the issue, set out the options, and keep safety and performance at the centre of the decision. In places with a wide mix of older and newer housing, such as Cardiff, Bristol and the surrounding areas, that kind of flexibility can make a real difference.
Solar installation is not mysterious, but it should be methodical. When the planning is sound and the work is carried out by accredited professionals, the process is usually quicker and less disruptive than many people expect. The best result is not just a system on the roof. It is the confidence that it has been fitted properly, tested properly, and set up to deliver savings for years to come.
